AltEnergyMag is having a residential PV system installed and monitoring the process. This is part 1 of a series of articles we will publish along the way in order to demonstrate and explain a real world project for our readers to follow and learn from.
Bob Hetherington | AltEnergyMag.com
So here we go --- the trucks have arrived, all the parts are here --- and the adventure begins. We are beginning the installation of our demo PV system today and are excited to see it unfold and to report on the experience as well as the results.
Firstly though, I want to back up in time to the beginning of the process to explain the steps involved to get to this stage. While not a difficult process --- it was more time consuming than I anticipated. Let’s start with the equipment we are using --- and special thanks to the companies that stepped up to the plate so this project could happen in the first place.
- LG Solar supplied us with all of the PV modules. 17 - LG255S1C-G2 High Efficiency Mono X Modules
- Schletter supplied the mounting system.
- EcoFasten Solar provided the GreenFasten™ roof attachments.
- Tenco Solar is doing the installation of the system and supplied the micro-inverters and other bits and pieces required.
The System
We decided early on that we wanted to maximize the number of modules in the system but in our case, as in many other city installations, we are limited by the physical constraints of the roof. By the time we dodge some roof vents etc. we will end up with 14 modules on the south slope of the roof and an additional 3 on the east slope. Because the west facing slope faces the street we decided it would not be aesthetically pleasing to mount any modules on that side. While we could have fit more than 3 modules on the east slope, the maximum allowable number of micro-inverters on one breaker is 17, and since we are limited in space on our electrical panel, we limited ourselves to 3 modules on that surface.
Micro-inverters were selected rather than a string inverter for a few reasons:
- We will be able to monitor each panel individually to compare orientation, shading etc. This is not only beneficial for demonstration purposes but it will alert us if we see a performance decrease on any individual module so we can troubleshoot the problem.
- Since there are variable factors such as orientation with our small system, we did not want the overall performance of the system affected by the differences in performance of the modules as is the case with string inverters.
- We may change some of the modules over time for demonstration purposes and we felt that micro-inverters would make this an easier process both for installation and for monitoring purposes. In fact we will be able to compare performance of various modules placed side by side.
The fasteners and mounting system are designed for flush mounting on the asphalt shingle roof.
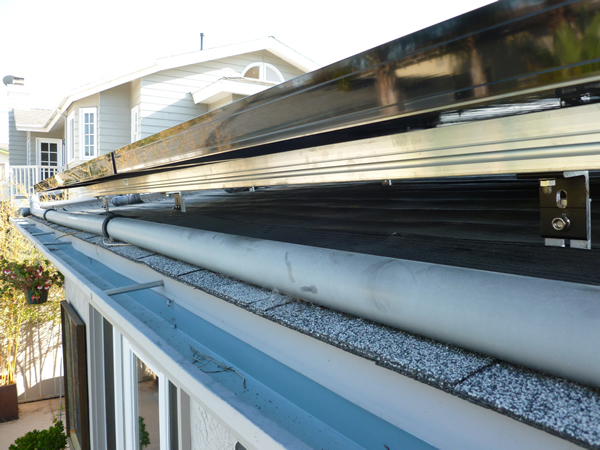
The modules will be mounted about 4” above an existing solar pool water heating system which consists of a mat of black rubberlike tubes where the pool water circulates to pick up heat from the sun. Putting the PV modules over this mat is a bit of an experiment. Since it is the only place we can fit the modules, we don’t have much choice. Our thinking is that we will still get some pool water heating from the mat system --- better than nothing --- at no cost. The other benefit of leaving the pool system in place is that we may get a small efficiency increase from the PV modules due to cooling effect of pool water circulating below them. We’ll find out if the experiment is a success once we get started.

Equipment Ordering and Delivery
Since we are doing this as a demonstration project and working with some of our manufacturing clients, it was up to us to act as middle man and get the equipment delivered to the site. We worked with Tenco to come up with quantities and requirements.
The first order of business was the modules. LG stepped up and recommended their 255 watt Mono-X modules for the project. Once we settled on quantity, it only took a matter of days for the truck to arrive with the modules nicely packed on a single pallet. Easy to unload and unpack --- and well protected for the shipping journey. Very nice looking modules.
EcoFasten Solar was also a pleasure to work with. Their only questions were --- how many fasteners, what color preference and what configuration was necessary. Within a few days we had a box of hardware on our doorstep.
Lastly, we worked with Schletter for the mounting system. They have an online form that we filled in to give them the data they needed for the design. Tenco sent them a sketch of the layout and from there they sent back a detailed drawing for approval. This process only took a few days back and forth and once we signed off on the design --- they manufactured the mounts and sent them out within a week. Again, a pleasure to work with people who know what they are doing.
The inverters and other bits and pieces will be provided by Tenco from their stock so that’s it for the procurement department.
The Design and Permitting Process
In our case, the constraining design factor was geometry. Based on the power bills, we knew we couldn’t meet 100% of the demand, so the goal was to fit as many modules as possible on the roof to come as close as we could while maintaining a reasonable budget target which would show return on investment.
Tenco prepared the drawings and information package needed for the installation permits. They consist of:
- A roof and site plan showing the location of the modules with notes
- PV mounting details
- A single line diagram showing electrical details
- Manufacturers drawings of the equipment to be used
Almost ready to go!
Now we hit a roadblock --- and an unnecessary one in my opinion.
We needed to make an appointment with San Diego City Hall to have the plans reviewed and obtain the permit. The next available appointment isn’t for 3 weeks and if changes are needed – another 3 weeks for another appointment --- and so on. Yikes!
Apparently there is a 3 week delay because there are many permit applications --- and yet there are also many that don’t show up for their appointments. It appears that some contractors are simply making multiple appointments --- in case they need them --- because they know there is a long wait. Perhaps the system could be reviewed to cut down on the wait time and streamline the process. We are after all trying to wean ourselves from carbon fuels as quickly as possible.
6 weeks later --- after making minor changes to the permit docs and waiting another 3 weeks --- the permit was issued and the project was back on track.
Installation Days
As I’m writing this, 3 trucks are pulling up with ladders, equipment and eager installers ready to attack our innocent abode! It’s installation Day 1 of a scheduled 3.
Before I knew it, there were 3 guys on the roof installing the GreenFasten flashings. They had not used this product before so my job was to get their opinion. The consensus --- very nice looking product, compact design, easy-to-install because everything was included and the built in rubber washer made a great seal for the lag bolt. It doesn’t rain much in San Diego --- but when it does these fasteners will be put to the test. In the meantime I am confident that we will not have a problem and you can hardly tell the roof was penetrated.
 Next, up go the Schletter mounting system --- the installers are moving along at a very fast rate and I’m impressed by their competence and hard work ethic. Again, they had not worked with the Schletter product before but that did not hinder the progress. Their comment --- these are much stronger than the rails we are used to using (I did not ask the name) and they are simple to install. Half the day gone, the mounts are in and leveled, and the inverters are being mounted.
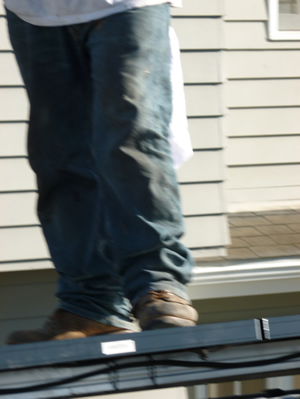
Soon, modules are starting their journey to the roof and once again I asked the installers to comment on them. They have no experience with LG panels but their impression is that they appear to be well built and the frames are much stronger than they are used to. In fact as I cringed a bit, one of the installers demonstrated by standing on the edge of one of the mounted modules. Neither the frame nor the rail it was mounted on budged an inch. I’m a happy camper --- and is it just me or do solar panels just look cool on your roof?
So, at the end of day one, most of the equipment is installed and the conduit is making its way back to the electrical panel which is unfortunately on the opposite side of the house. We chose to run it under the eave rather than over the roof. This is something to bear in mind if you are planning a system. Conduit can be an unsightly part of the project. Tenco promises to paint it to match the house so that’s the best we can do. I suggested they tunnel under the house but the subject was quickly changed to something more of this earth.
Installation Day 2 is a much more sedate day with only 2 installers on site to finish the details of the installation. Jobs include installing the last few modules, finishing the conduit (and painting it) and pulling the wire back to the panel to make the connections. Since we are removing an older A/C unit (not necessary in this coastal location and never used) it was a simple matter to use the abandoned breaker for the PV system connection. That means there is no new equipment to install on the wall by our electrical panel. A new ground rod was installed however.
That’s about it. Just some cleanup and the installation job is completed --- a full day ahead of schedule.
Oh, one last detail. We needed to turn on the solar pool heating system to be sure there are no new leaks or punctures. Hold your breath --- put a rain hat on --- and let her rip. Whew, nothing but dust rising from the roof. We’re good to go.

The content & opinions in this article are the author’s and do not necessarily represent the views of AltEnergyMag
Comments (0)
This post does not have any comments. Be the first to leave a comment below.
Featured Product


